Blog

Introducing Our New Course: Winning With Workload

Workload management is one of the most important and often overlooked aspects of pitching. With the right approach, pitchers can enhance performance while reducing the risk of injury. Our newest course, Winning With Workload, is designed to help you understand and apply the principles of workload management.

This course dives deep into the science and practical application of managing throwing workloads. It covers everything from why traditional pitch counts aren’t enough to how fatigue plays a role in injuries. 

Here’s what you’ll find in the course:

  • Understanding Fatigue: Learn why fatigue is the number one factor behind throwing injuries.

  • Assessing Workload: Discover how to track and calculate daily throwing workloads, accounting for both game-day pitches and all the other throws that add up.

  • Progressive Programming: Explore multiple course modules designed to build throwing fitness while avoiding overuse.

  • Dynamic Adjustments: Understand how to adjust workloads in real-time based on a pitcher’s readiness, helping to optimize performance while reducing injury risk.

  • And More: Winning With Workload includes practical units explaining how to use our free player app to manage workload, discussions with influencers in the game around the topic and so much more… 


Winning With Workload is now part of the KP3 Community.

What Is the KP3 Community? The KP3 Community is a space where players, coaches and parents come together to explore advanced baseball topics like biomechanics, workload management, strength and other player development topics. Here’s what you can expect:

  • New Content Regularly: Access new courses, articles, and resources designed to keep you learning and improving.

  • Expert Insights: Gain knowledge from some of the top minds in baseball and sports science.

  • A Community of Learners: Connect with others who share your passion for the game.


What does KP3 Community cost to join?

Payment options for KP3 Community include:


Annual Access: $99.99/year

Lifetime Access: $299


Both options include unlimited access to courses “Winning With Workload”, “The Future Of Arm Care” and future course releases. 


Ready to Dive In?

If you’re ready to implement and understand workload management, our course Winning With Workload is the perfect place to start. Join the KP3 Community and see how throwing workload can help you stay healthy/ perform at your best.

Dive deep into our other KP3 Community courses and learn about player development topics that are pushing the front line within the game today! 


Get Started With KP3 Community


Shoulder Blades, Mobility, and Pitching: The Hidden Link That Keeps Arms Healthy

Most pitchers and their parents hear words like rotator cuff or labrum in an office and immediately brace for the worst. But the truth is, the story of a healthy shoulder doesn’t start with the cuff or the joint at all.

It starts with the shoulder blade the scapula.

You might not know it but… the scapula is the unsung hero of any successful pitcher.


Tighten Those Bolts up!

In the shoulder the scapula connects the upper arm to the body and provides the foundation for nearly every movement the shoulder makes.

When the scapula moves well smoothly rotating, tilting, and gliding, the shoulder can create and withstand incredible forces safely. But when the scapula isnt working quite right, the entire throwing motion can start to break down.

When the scapula isnt working quite right clinicians often diagnose it as Scapular Dyskinesis.

Scapular Dyskinesis is a fancy term for a simple concept: the shoulder blade isn’t moving or stabilizing the way it’s supposed to.

For an easy to remember example we asked ChatGPT to help us out and it said…

”For pitchers, Scapular Dyskinesis is like trying to throw a 95 mph fastball with loose bolts in your engine mount. You might get away with it for a while but something’s going to rattle loose at come point.”

So it seems according to ChatGPT we just need to tighten those blots up right!?


Step 1 To Tightening The Bolts… Diagnosing The Problem.

Scapular Dyskinesis doesn’t look the same in everyone. For some, the shoulder blade wings out dramatically when lifting the arm. For others, it tilts awkwardly, shrugs upward instead of gliding down, or simply doesn’t move in rhythm with the opposite side.

Those differences matter.

In a healthy shoulder, the scapula rotates upward, tilts posteriorly, and protracts slightly to support the humerus through a full throwing motion. It’s not just a piece of bone floating on your back, it’s a dynamic platform, constantly adjusting to load and motion.

When it loses control, the shoulder has to pick up the slack. Muscles that should be firing in sync start competing. The cuff overworks. The labrum gets tugged in ways it shouldn’t. Fatigue builds faster. Performance dips.

You would think that the moment something is out of wack you would get pain right? It’s not always pain that shows up first though. Sometimes it’s just a small loss in velocity, or a pitcher saying, “I don’t feel as loose today.”

We cannot take a one size fits all model in diagnosing the problem. It takes an experienced PT to identify the concerning criteria.

You don’t need a $10,000 motion capture lab to see scapular dysfunction. Sometimes, the simplest tests tell you the most.

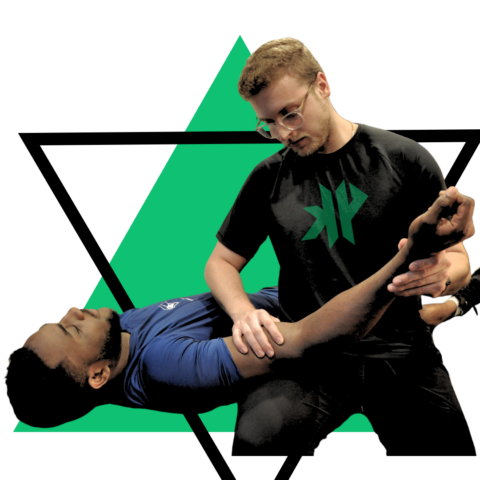
Have an athlete lift their arm slowly without weight, it might look fine. Then hand them a 3–5 lb dumbbell and watch again.

That extra load often exposes everything. You’ll see the scapula start to wing out slightly, rotate unevenly, or lose rhythm as the arm lowers. That’s not just a coordination issue it’s a sign that the stabilizers (like the serratus anterior, lower trap, and rhomboids) are struggling to keep up.

If the control is solid without weight but collapses under load, that’s an endurance issue. If it’s poor in both situations, there’s likely a deeper motor control or structural problem.

Either way, the takeaway is clear: the scapula is underperforming relative to the demands of throwing and that’s a problem we NEED to fix.

Throwing a baseball is not a natural movement. It’s violent, complex, and asymmetrical by design.

Over time, the body adapts. Pitchers often develop greater external rotation in their throwing shoulder and lose internal rotation. That adaptation isn’t necessarily bad, it’s part of what allows for performance at a high level.

BUT… balance matters.

When those adaptations become excessive, or when the scapula doesn’t keep pace with those changes, trouble starts. The total arc of motion between both shoulders should remain roughly equal. If one side begins to dominate say, a pitcher has a total arc of 160° on his left shoulder but only 140° on the right as a right handed thrower, the system’s efficiency breaks down.

The result? Micro-stresses start stacking up, rep after rep, throw over throw.

And because these issues build gradually, most players don’t realize anything’s wrong until it’s already limiting their performance or worse… they get hurt.

At KineticPro Physical Therapy in Tampa, we never assess the shoulder in isolation. That’s mistake number one.

Every pitcher that walks through our doors is evaluated as a system. How does the scapula sit at rest? How does it move when the arm flexes or abducts? How does the throwing shoulder differ from the non-throwing side?

These aren’t small questions, they’re the difference between chasing pain and solving it.

We’ve seen athletes struggle after months of “shoulder work” elsewhere, still frustrated that nothing changed. Often, no one ever looked at the scapula. The athlete was misdiagnosed!

When you understand how the shoulder blade interacts with the thoracic spine, rib cage, and arm, you realize that treating the cuff without addressing the foundation is like patching drywall without fixing the studs underneath.

You need to find confidence in your assessment. Thats step 1. Assuming your engine always has a problem when its really the bolts holding it in place can cost you 1000s in mechanical fees. If you are constantly getting the wrong diagnosis then you are wasting both your time and money. This is the number one mistake we see from parents and players. They assume ALL Physical Therapists have the experience needed to make the right decisions. The reality is that most don’t.

Treating baseball pitchers is unique and if you are one that requires attention then you need to find a trustworthy PT that can properly diagnose the problem.

Once diagnosed… well then its time to FIX the problem!


Step 2 To Tightening The Bolts… Picking The Right Tools.

Just like pitching mechanics or strength training, scapular control is a trainable skill.

We can build better timing, coordination, and endurance of the muscles that control scapular motion. The key isn’t just getting them stronger, it’s getting them ”smarter”.

To do this we need a battery of training exercises that actually retrain the supporting musculature to the scapula.


Serratus Wall Slides with Foam Roller


90/90 External Rotation Walkouts

Reverse Bear Crawls


Prone W to Y


Landmine Press with Shrug


(Talk about exercise solution examples and how we give our athletes a list of items to do through Kinnect)

It’s easy to think of physical therapy as something reactive, something you do after you’re hurt. But for pitchers, it’s one of the most powerful preventative tools available.

When we evaluate scapular control early, we don’t just look to prevent injury, we prepare to optimize performance.

This is exactly what separates average rehab from what we do at KineticPro Physical Therapy in Tampa Florida.


To Conclude

Tampa has become a hub for baseball talent, high school, college arms, and pros all chasing the same thing: staying healthy while finding new peaks in performance.

With that comes a wave of shoulder and elbow issues that often trace back to the same root causes.

That’s why our physical therapy process, in part, starts with the shoulder blade. We assess how it moves, how the shoulder fatigues, how it interacts with the rest of the body. Then we build our roadmap from there, not just to fix pain, but to make throwing feel effortless again… to find a new level of peak performance for each athlete that walks through our door.

It’s not about telling players to throw less! It’s about helping each pitcher understand how they can DO MORE!

A healthy shoulder isn’t about chasing flexibility or strength in isolation. It’s about harmony, how the scapula, shoulder, and arm move together under real-world stress.

Scapular Dyskinesis might sound like a clinical term, but in practice, it’s one of the simplest, most fixable issues that can derail a throwing career. The earlier you spot it, the faster it’s corrected.

At KineticPro Physical Therapy, we believe in using research-backed assessment protocols and real-world experience to create a plan that works for the athlete.

At the end of the day, every pitcher wants the same thing: to stay healthy, throw hard, and love the game for as long as possible.

Scapular Dyskinesis isn’t a diagnosis to fear it’s a signal. A sign that your body’s trying to tell you something before things get worse.

Whether you’re a parent worried about your kid’s sore shoulder, or a college pitcher trying to unlock a few extra miles per hour, understanding how the scapula works changes everything. We are focused on assuring we allow our athletes to play the game as long as possible. We are focused on peak performance and allowing our athletes to continue to continue to chase their dreams.

If you’re in Tampa and you’ve been chasing shoulder pain that never seems to go away, or if you just want to make sure your arm is performing at its peak, schedule an assessment with us at KineticPro Physical Therapy.

Our assessment process is the first step in assuring you get back on the field at your best. WE BUILD PITCHERS.


 

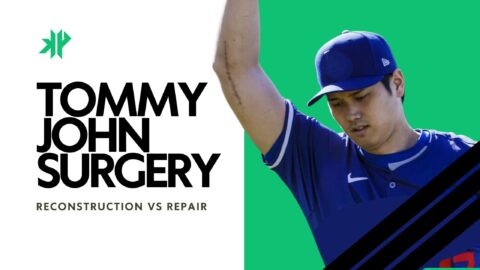
When people hear the phrase “Tommy John surgery,” they tend to assume it’s one single procedure with one predictable outcome. In reality, that phrase has become a kind of shorthand for several very different surgeries involving the ulnar collateral ligament of the elbow. Over the last decade in particular, the options have expanded, the techniques have evolved, and the recovery timelines have changed dramatically. That’s why you’ll hear one athlete talk about being back on the mound in six months while another is staring down a year and a half of rehab, even though both are said to have “had Tommy John.”

The original Tommy John surgery, the one that dates back to the 1970s, is what surgeons now call a UCL reconstruction. In this procedure, the damaged ligament isn’t fixed or patched up. It’s replaced entirely. The surgeon removes the compromised UCL and reconstructs a new one using a tendon graft harvested from either somewhere else in the athlete’s body or from a cadaver (someone else’s graft). Most commonly the graft is pulled from your forearm or the hamstring. The tendon is then threaded through bone tunnels drilled into the ulna and humerus, essentially creating a brand-new ligament. The body then has to biologically accept and remodel that graft over time. This is a long process, which is why the recovery timeline for a full reconstruction is typically measured in a year or more, especially for pitchers.

For a long time, this was the only real option. If you tore your UCL, especially as a pitcher, reconstruction was the gold standard. It worked, it was durable, and it saved careers. The downside, of course, was how invasive it was and how long the rehab took. You weren’t just healing a ligament. You were waiting for an entirely new piece of tissue to integrate into bone and adapt to the stresses of throwing a baseball at high velocity. Even today, reconstruction still has the longest track record and is often the best option for athletes with chronic damage, poor tissue quality, or years of wear and tear on the elbow.

Over time, surgeons began to notice something important. Not all UCL injuries look the same. Some tears are acute and clean, especially in younger athletes. Instead of the ligament slowly fraying over years, it might pull off the bone in a single moment. In those cases, the ligament tissue itself can still be healthy. That observation opened the door to a different approach: repair instead of reconstruction.

UCL repair is exactly what it sounds like. Rather than replacing the ligament, the surgeon preserves it and reattaches the torn portion back to the bone. Early versions of UCL repair, however, didn’t have great results. Without reinforcement, the repaired ligament was vulnerable during the healing process, and failure rates were higher. That’s where the internal brace comes in, and this is where a lot of modern confusion around “Tommy John surgery” begins.

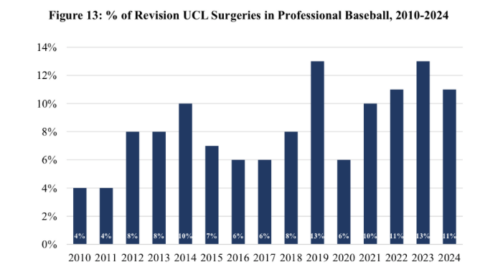
It might be worth noting that in todays game we see re-tearing happen a lot at the higher level. athletes are having a second Tommy John Surgery in their pro career. With the increased rate of Tommy John Surgery happening across the game and the re-tearing at the professional level, it’s obvious why a new form of Tommy John has been pushed. 

The internal brace is a strong, collagen-coated suture tape that is anchored across the repaired ligament. It acts like a seatbelt. It’s not meant to permanently replace the ligament or take full loads forever. Instead, it protects the healing tissue during the most vulnerable early phase of rehab. The athlete’s own ligament still does the long-term work, but the brace allows that ligament to heal in a safer, more controlled environment. Because the native anatomy is preserved and no graft has to biologically incorporate, the recovery timeline can be dramatically shorter.

This is why you sometimes hear about pitchers returning to competitive throwing in six to nine months after “Tommy John surgery.” In almost every one of those cases, what they actually had was a UCL repair with an internal brace. It’s still elbow surgery. It’s still serious. But it’s not the same operation that requires a full year and a half of rehab. The key, though, is that not everyone is a candidate. Repair with an internal brace works best in younger athletes with acute tears and good ligament quality. It’s much less effective in elbows that have been breaking down over time.

There are also situations where a surgeon may combine techniques. In some reconstructions, an internal brace is added alongside the tendon graft. The idea is to provide extra stability early on and potentially allow for a more confident rehab progression. However, this doesn’t magically turn a reconstruction into a six-month recovery. The graft still needs time to heal and mature, and the overall timeline remains much closer to that of a traditional Tommy John. The internal brace in this context is more of a supplement than a shortcut.

What complicates all of this is language. Fans, media members, and even athletes often use “Tommy John” as a blanket term. It doesn’t distinguish between reconstruction and repair. It doesn’t tell you whether an internal brace was used. It doesn’t explain whether the ligament was replaced or preserved. As a result, comparisons can be misleading. One pitcher’s comeback story might sound miraculous, while another’s absence feels endless, even though both are described in the exact same way.

The decision about which surgery to perform is ultimately based on what the surgeon sees in the elbow. The location of the tear matters. The quality of the ligament tissue matters. The age of the athlete, their throwing history, and whether the injury is acute or chronic all matter. A clean tear near the bone in a young pitcher with a healthy ligament may be an excellent candidate for repair with an internal brace. A veteran pitcher with years of accumulated stress and a frayed ligament is far more likely to need a full reconstruction.

It’s also worth noting that while reconstruction has decades of data behind it, repair with internal bracing is still relatively new in the big picture. The early and mid-term results have been very encouraging, but long-term durability is still being studied. That doesn’t make it risky or experimental, but it does mean that surgeons are careful about who they recommend it for. Done on the right patient, it can be a career-saver with a much faster return. Done on the wrong patient, it can fail.

So when someone says an athlete “had Tommy John,” the real question should be, “Which one?” Was the ligament replaced, or was it repaired? Was an internal brace used, or not? Those details tell you far more about what the athlete went through and what their road back is going to look like than the name of the surgery ever could. Tommy John surgery isn’t one thing anymore, and understanding that difference helps make sense of why recoveries can look so wildly different from one athlete to the next.


Want to get started training KP? We offer training options in (Tampa FL) for both healthy athletes seeking performance and injured athletes looking for PT.
For more on our Physical Therapy Click Here
To learn more about our performance training  Click Here

Want more KP? Be sure to check us out on our social media channels…
Youtube: @KP3
Twitter: @Kinetic_Pro
Instagram: @KineticProPerformance


The UCL Graft Journey: Understanding Tommy John Surgery’s Critical Timelines

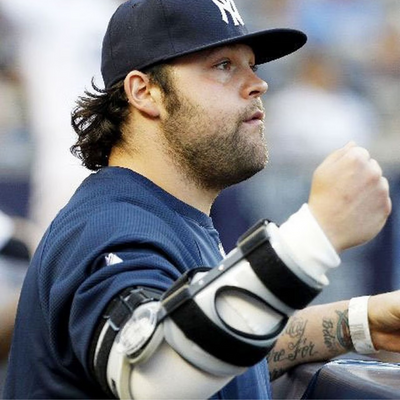
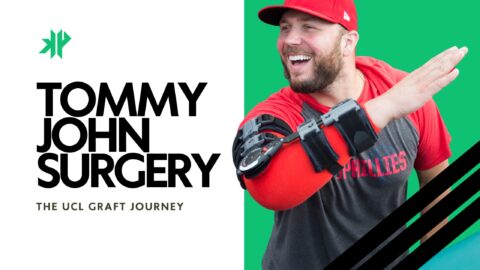
Have you ever seen someone walking around with one of those robot looking braces on their arm only to find out they have just had Tommy John Surgery? You might have wondered why pitchers need to wear such a device and what exactly that device is allowing the athlete to do. In the context of recovery from Tommy John there are so many questions parents and recipients have along these lines. 

You’ve likely heard the term “Tommy John Surgery” (UCL Reconstruction) tossed around, and probably, the even more common refrain: “It’s a year-long recovery.” But what exactly is happening during that year? Why does it take so long? And, most critically, when does that new ligament – the graft – truly “take” or “heal”? As someone who’s delved into the intricacies of Tommy John Surgery, I can tell you that understanding the biology behind the timeline is key to patience and successful rehabilitation. It’s not just about getting clearance from your surgeon; it’s about respecting the incredible, complex process your body goes through to rebuild itself.

Step 1: The Post Op Period (Fresh From Surgery)

Right after surgery, that new UCL graft is at its most vulnerable. Like, extremely vulnerable. We’re talking about a piece of tendon (often from your forearm or hamstring) that’s been surgically threaded through bone tunnels and anchored with sutures. While those sutures and bone anchors provide immediate mechanical stability, the graft itself is essentially a dead piece of tissue awaiting support to come back to life. Think about it like this, the blood supply has been severed, the cells within the tendon are starting to die off, and your body hasn’t yet recognized it as “part of the team.” It’s an inert structure, held in place by surgical magic, but lacking its own biological life support system. This is why you’re in a brace, restricted to specific flexion and extension limits, and why your physical therapist gives you the “death stare” if you even think about doing something stupid. “The initial period following UCL reconstruction is characterized by the graft’s avascularity and cellular necrosis, making it highly susceptible to mechanical failure without adequate protection,” notes a foundational text on sports medicine (Andrews & Wilk, 2012). This isn’t just theory; it’s why pushing it too early is a one-way ticket back to the operating table.

So, how does a dead piece of tendon become a strong, living ligament? This incredible process is called ligamentization. It’s a biological marvel that transforms the graft over many months. The first phase, spanning roughly the first six weeks, is dominated by inflammation and revascularization. Your body, ever the diligent repair crew, immediately sends inflammatory cells to the graft site. This is quickly followed by the growth of new blood vessels that slowly infiltrate the graft—a process known as revascularization. Think of it like a new road network being built into a previously isolated area. Crucially, during this phase, the graft is actually getting weaker before it gets stronger, as the initial cells die off and the new ones haven’t fully moved in and set up shop (Ahmad et al., 2004). This fragility is why strict protection of a brace and caution from the athlete is paramount.


Step 2: The Intermediate Period

As we move into the intermediate period, from about six weeks to six months, the elbow transitions into the stage of cellular proliferation and collagen deposition. By about six weeks post-op, the surgical fixation points (sutures, bone tunnels) are generally considered stable enough to allow for increased range of motion and discontinuation of the brace for daily activities. This is the first major psychological hurdle where you start to feel a little more “normal.” However, the major biological shift is underway: specialized cells called fibroblasts migrate into the graft, laying down new, haphazardly organized collagen fibers. Imagine a tangled mess of spaghetti. But they’re there, forming the early scaffolding of your new ligament. The graft is slowly gaining intrinsic biological strength, which is why it becomes less vulnerable, but it remains far from robust enough for high-velocity stress.

The long haul begins in the subsequent phase: remodeling and maturation, spanning from six months out to eighteen months or even longer. This is where the magic truly happens. The disorganized collagen fibers begin to align themselves along the lines of stress, becoming stronger and more organized. The graft tissue gradually transforms, both microscopically and macroscopically, to finally resemble a native ligament. It becomes denser, stiffer, and, crucially, capable of withstanding the incredible forces placed on the elbow during overhead throwing. “The complete biological maturation of the graft to a tissue structurally comparable to native UCL has been documented to extend beyond 12 months, often up to 18 months or more,” according to studies on graft histology (Sauers et al., 2017).


Step 3: The Return To Throw Period

To directly answer the burning question of “how  vulnerable is the graft at this point? The graft is no longer critically vulnerable and is structurally sound enough to begin a controlled, low-stress activity around four to six months post-op. This is not arbitrary; it is the time point where the graft has undergone sufficient ligamentization to tolerate the controlled, progressive stresses of a return-to-throwing program. The new collagen is forming, and the tissue has gained enough tensile strength to manage the low-intensity, gradual build-up of throwing mechanics. The final functional test comes at nine to twelve months, where athletes begin returning to competitive pitching. While the graft isn’t fully mature, it’s considered functionally strong enough to withstand increasing valgus stress. However, for the graft to achieve its true peak strength and maximum durability, the process extends beyond the year mark, often requiring up to eighteen months of careful, progressive loading to account for the final stages of collagen remodeling and alignment. This is why continued strength development AND A PROPERLY PROGRESSED THROWING PROGRAM are so critical. Finding the right people and programs for both could mean the difference in a successful return vs one to which you struggle to regain your footing at the higher levels. 


Conclusion

Dr. Ahmad and his team pointed out that only 28% of athletes return to who they once were on the field 3 years after Tommy John Surgery. Where we previously defined the surgery as massively successful, this paper identifies the difference in just throwing a pitch in a game again after TJ to reaching the same standard of performance as pre surgery.

The journey of a UCL graft from a harvested tendon to a fully integrated, functional ligament is a testament to your body’s healing capabilities. But it’s not a fast process. The initial fear of re-testing the UCL right out of surgery is completely valid because the graft is biologically compromised and reliant solely on mechanical fixation. As time progresses, through the incredible process of ligamentization, your graft gains its own blood supply, new cells, and organized collagen fibers, making it progressively less vulnerable. But “less vulnerable” never means “invincible,” especially in the high-stress environment of overhead athletics or pitching. Understanding these biological timelines helps us appreciate the importance of adherence to rehab protocols, patience, and realistic expectations.

As the research study referenced here indicates, it’s not just about getting back on the field… it’s about getting back better and winning your future. Understand the timelines, define success in the process and get back to performing at your best. That should be our goals. 


Want to get started training with KP?
Check out our in person training or our PT services located in Tampa FL.

Want more KP? Be sure to check us out on our social media channels…
Youtube: @KP3
Twitter: @Kinetic_Pro
Instagram: @KineticProPerformance


Opposed v Unopposed


Should we do a bunch of training in isolation or should we have guys play more games? Safe to say we would all agree that we want “athletes” on the field. We want guys who have “instincts”…


But what does this mean? How do we develop it? Do we “not over coach” and throw the player into a sink or swim environment on the field so they develop “instincts”? Do we stop simulated games constantly to create “teachable moments”? What the heck does it mean to be an “athlete”? How do we define that?

Research is coming out rapidly on Ecological Dynamics… this is a model that illustrates how we as coaches can change understanding and action in an athlete by planning or observing 3 things…


Organism- the individual (think size of a player or how good their eye sight is)


Task- the instructions (think rules of the game, what bat to use.. etc)


Environment- natural elements (think turf vs grass or the presence of a crowd vs not)

At any point these 3 things impact our abilities to deliver applicable changes to our athletes. Even with this detail in hand it can often be difficult for coaches to understand their role in the over all skill acquisition process. When do we step in to intervene? When does speaking too much become over coaching? If there is such a thing as over coaching then there must be the possibility of under coaching right? Truthfully we all just want to choose the best practice plan to assure our athletes receive the best outcome! 


So back to our core question… which is better unopposed or opposed?

It seems opposed small sided games teach athletes in a way no “lesson” can. Most of this comes from the elevated intent most athletes gather when in gamified environments. Now with that being said I also think it’s massively important for us to recognize that not all games have to be “the game”. Creative practice models are often best when coaches implement consistent skill development games with the goal of using the game to strengthen a team weakness.

Small sided games are used around the world and universally in other sports. Sports like soccer where “academies” take on the responsibility of long term athletic development are known for investing millions in what look to be play grounds. These playground are meticulously crafted small sided game environments. These players are sculpted by years of skill specific small sided games.

If you think about it, it’s what we used to do as kids in the back yard. We set up challenges, expanded our creativity, threw things over trees, hit things with various size bats, jumped over things just because we wanted to “see if we could”.

That creativity is disappearing today in our youth and we have a responsibility now more than ever to encourage this challenge of pushing athletic boundaries in our athletes.


How we push these kids athletic creativity matters… how these kids respond to our encouragement matters. Again back to our question, opposed or unopposed? How do we teach our kids to improve?

Here’s the frame work we use at KP. It’s a simple test re-test model…


Step 1- “The Skill” (Opposed)

Putting an athlete into an opposed environment doesn’t mean they have to have a hitter in the box. Opposed means they just have to have an environmental constraint for feedback. Think about a pen where there is no hitter, then think about a pen where there is a hitting dummy in the box. Hitting the dummy provides feedback and can lead to improvement. This is opposed.

This for us is using posts to determine a quality miss from a poor miss on the zone. This for us is using a smaller than strike zone BP Zone and additionally putting an intended zone green target up to identify the “ideal” location of a pitch”. This is also working sequences and establishing “consequential” counts in pen where an athlete can walk a batter in a pen even with a constrained zone.

Check Out BP Zones Here!

We use opposed pen, live AB or game data for evaluation as much as possible. All of our pens are generally seen to be “evaluations” of athlete. It’s our time to discover how the athlete is developing. We want this to be the skill in a full game environment or resemble the skill in a full game environment as best as possible. We ask questions like…

-Is this athlete making faster adjustments pitch to pitch to achieve the desired outcome?

-Is this athlete showcasing any newly formed good or bad habits from training?

-Is this athlete expressing frustration or excitement surrounding the outcome?


Then from there we begin to consider our step 2…


2- “Unopposed”

At KP we use a skill acquisition model we developed that goes “Assess, Feel, Drill”…


ASSESS

In our Step 1 we covered the assess aspect of our skill acquisition model. Assess is not just the “test” though. One of the most overlooked aspects of an assessment is the period of time at which an athlete begins to “understand” the problem. Assessments are important but how we communicate the problem to the athlete is the MOST important part of an assessment. It is critical an athlete understands the difference of “good” and “bad” through the lens of the assessment to invoke change. Too often coaches stand and deliver a high level assessment and the athlete listens to how smart the coach is but doesn’t understand the actual training demand. Smart coaches are good. Smart players win games.

Once the assessment is clear to our athletes we can move to the next step, Feel.


FEEL

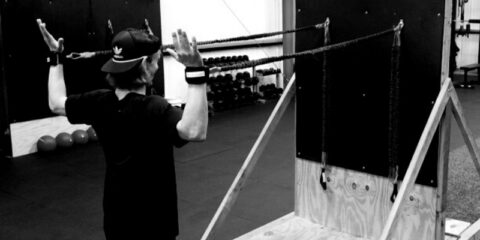
Towel drills, water bags, belts with bungee cords on them, swing aids that you can’t actually hit things with… these are all things that while they resemble the skill aren’t actually the skill. They are designed to help you understand the skill… but again they aren’t the skill.

My eyes were opened to this at the start of my career. I got to spend a few years in a biomechanics lab where we tested all kinds of movement. Without fail what we found is that modalities are great of allowing players to think about isolated movements but they almost always cause a drastically different movement pattern than the actual skill. A good example of this is a towel during a pitchers towel drill. Athletes don’t experience as much layback, abduction angles get higher, elbow extension happens at a much different time and the timing of what would be release is much different than when throwing.

For this reason many in the industry demonize modalities. It’s become popular to hate towel drills but most can’t articulate why they don’t like them. Instead they use a water bag and it’s funny to watch because water bags fall under the same category… just a modality for FEEL.

So what is a feel? A feel is a place to find a cue. It’s an isolated movement or constraint that allows the coach to help the athlete identify how they can strategize mentally to achieve the desired outcome.

A great example of this is if you have ever walked around mimicking a small part of a golf swing or throwing motion over and over and over… in your head you think “…right there… boom. Right there… ok flatten the wrist just a touch… keep the thumb down from the start on this one… boom. There it is. That’s what I am looking for. Repeat that.” Over and over you are in your head trying to strategize the movement cue “thumb down”, “wrist flat”…. You aren’t actually throwing but you are planning to take this and you are eager to go put it into action to see if it will translate to the actual skill next time you go to practice.

Feels are cues. Most private lessons today coaches spend hours of time here. Over and over getting the athlete to establish a cue. Sometimes this is all the athlete gets from the coach. Cue upon cue upon cue.

That takes us to the last part though… it’s time to implement the cue. How we choose to implement is important. It time for a drill.


DRILL

Everyone has a new “drill” today. Hop on Instagram for 5 min and you see “3 drills to improve your fastball velocity”. The mistake most make with drills is they don’t understand that drills themselves are worthless. It’s not the drill that makes you throw harder. It’s not the drill that “fixes” that mechanical issues. Drills provide us a grounds to achieve a higher probability of success in changing skill.

When an athlete does a drill they should be thinking on the cue they’ve established through feels and applying it to the understanding they have crested in assessment.

Prior to the drill the athlete must consider the cue they are using, “thumb down out of the glove, thumb down, thumb down…”. Then they make the throw through the drill, “YES that was GOOD!”. Because they have a comprehension of good vs bad they can now vet throw to throw success of the cue into drill.

If enough YES then the athlete can move to a less constrained drill still unopposed and keep working on solidifying that skill. Too many NO, the athlete needs to regress the drill to a more constrained position or go back to the FEEL stage to rethink the cue.

At some point we move to step 3 and this is the unique part that most coaches miss… opposed development…


Step 3- “Small Sided Games” (Opposed)

Most coaches make the mistake of constantly assuming that athletes can bridge the gap from unopposed to full game or “Full Opposed”.Think about a pitcher getting ready for a baseball season. Why do they naturally want to throw pens before facing live hitters? Why do we as an industry require pitchers to throw pens before getting into a game? We would all agree that most pitchers cannot just jump from offseason build up to live environment and find success. They have to “shake the cobwebs” or “get their feet under them”.

So if we all agree on this then why do we allow our athletes to go straight from drill work to live game delivery of the skill?

How do we insert a time frame for this athlete to express the newly developed skill and work out strategies to successfully deliver this skill in game? It’s simple, “Small Sided Games”.

Small Sided Games give an athlete the chance to compete and problem solve in realtime while the set up of the game tips the scales in the athletes favor for success in implementing the newly learned skill. While in unopposed settings the coach might intervene often, during Small Sided Games the coach must learn to allow the feedback loop to come from the outcome.

For young coaches and coaches new to these concepts this is the toughest part, WE HAVE TO LET THE ATHLETE FAIL! 

Success and failure feed the developed feedback loop from the unopposed and the athlete must strategize to create adjustments on the fly to find success. Earlier we asked how to we develop adjustability? How do we develop athleticism. In Small Sided Games athletes and coaches can exaggerate constraints toward successful skills or failing skills. This gives the athlete the ability to take what they have learned in the unopposed and condition it in various environments. The skill becomes “battle tested” and the athlete explores options to express the skill when needed. We as coaches say someone is athletic when they display fluidity in movement, surprise us with decision making strategies on the field, adjust quickly to environments that require adaptability.

If an athlete doesn’t meet our standard of athleticism we often write them off or send them for “lessons”.

Obviously this closes the loop and takes us back to step 1. An athlete we deem to not be athletic, or possess the skills we desire, we must develop. Development is continuous. Opposed to Unopposed.


To Conclude.

It’s not one or the other. Development requires both. Development requires a detailed understanding of what “successful skill” looks like. It requires methodical thinking to outline and detail a plan of coaching that delivers an athlete from problem to solution. Then it requires relentless upkeep and stress testing as the game evolves into the future.

While most of the universe tweets about the small details of unopposed skill development it’s important to realize that majority of time for athletes should be spent in the opposed environments.

Coaching staffs need a plan. They need to understand the goal collectively of the plan. Blurring the lines of opposed practice time vs unopposed only leaves the athlete in confusion or feeling like they are working hard when they really aren’t getting better.

Coaches want to help. They offer insights and “panic coach” when things don’t go their players way in opposed settings. Out of fear of looking like they don’t know how to help they bring the athlete to a safe space and change the practice to unopposed. They spout cues, they teach mechanics, they interject subjective perspectives.

All of this is a lack of unified planning and process. They don’t realize or understand the importance of opposed practice time vs unopposed. Knee jerk reactions to identified failures lead to over coaching and underachieving athletes.

So who are you?

Are you an athlete that is getting over coached routinely? Are you a coach who struggles to detail and trust a development process? Maybe you’re a parent who is unable to allow your kid to fail?

We live in an instant gratification world where desire and expectations “HAVE” to be met in real time. Real development can’t meet the demand of NOW. It requires hard conversations, real failures… a real process to provide solutions to those failures in the long run. Productization of the unopposed has made athletes today REQUIRE coaches to tip the scales and offer more unopposed training today than we have experienced in the past.

Want to stand out in today’s world and see your athletes get high level results? Bet on Small Sided Games, don’t over coach and have a long term development plan for your athletes.


Want to get started training with KP? We offer both remote and in person training (Tampa FL). 
To train with KP?: Click Here

Want more KP? Be sure to check us out on our social media channels…
Youtube: @KP3
Twitter: @Kinetic_Pro
Instagram: @KineticProPerformance
Email: Support@KineticProBaseball.com


X

Lets Climb! Click here for quick links and support.